 The Beacon probe is a bed plate surface scanner that can create a thousand point bed mesh with sub-micron accuracy at 500mm/sec. It also acts as a Z end-stop switch which can be used for Z homing and bed leveling.
Did someone say Bacon?
The Beacon probe is a bed plate surface scanner that can create a thousand point bed mesh with sub-micron accuracy at 500mm/sec. It also acts as a Z end-stop switch which can be used for Z homing and bed leveling.
Mount specifications
Bolt hole centerline : 31.6mm
Bolt Hole Mounting center line to pcb tip:  12mm
Distance of pcb tip (of the board) to sensor CL:  8.5mm

Distance of board to hotend:
-----   3mm is the absolute closest
-----   5mm would be recommended minimum
-----   8mm would be recommended
-----   more is up to you

Gap of board to nozzle tip:
-----  2mm is the smallest realistic gap due to fasteners
-----  2.5-3mm ideal design gap?
-----  4mm is the largest recommended gap
-----  more loses resolution, but still works
Klipper setup and config
Install beacon software
ssh pi@mainsail.local
pi@mainsail:~ $ git clone https://github.com/beacon3d/beacon_klipper
pi@mainsail:~ $ ./beacon_klipper/install.sh
Power off the RaspberryPi and connect the probe to a USB port, power up the RaspberryPi. Beacon probe is not ‘hot pluggable’ and connecting while RaspberryPi is powered on may fry the board.
Get the serial ID of the Beacon
ssh pi@mainsail.local
pi@mainsail:~ $ ls /dev/serial/by-id/*
/dev/serial/by-id/usb-Beacon_Beacon_RevD_452CB565515137474C202020FF0C3628-if00
Update printer.cfg
If your printer presently has a [probe] section, you will need to remove it, [beacon] replaces it.
- Also look in the klipper managed configuration area - I had to remove BLTOUCH section containing dynamic probe offset
[beacon]
serial: /dev/serial/by-id/usb-Beacon_Beacon_RevD_452CB565515137474C202020FF0C3628-if00
x_offset: 0 # update for machine specific mount position
y_offset: 27
mesh_main_direction: x
mesh_runs: 2
backlash_comp: 0.005
cal_nozzle_z: 0.2 # <--- This value is dependent on what you use to determine Z Offset, I use a 0.2mm feeler guage - paper will be smaller than 0.2
[safe_z_home]
home_xy_position: 120,120
speed: 50
z_hop: 3
z_hop_speed: 5
[stepper_z]
endstop_pin: probe:z_virtual_endstop # use beacon as virtual endstop
homing_retract_dist: 0               # beacon needs this to be set to 0
Hardware installation and testing
- After mounting probe verify that it’s got appropriate bed clearance - I had to switch from cap head screws to flush mount screws to avoid bed collision
- Ensure back of probe isn’t protruding so that it impedes X homing / end-stop switch
- Update
printer.cfgwith Beacon config - Make sure Klipper can see the probe
BEACON_QUERY Last reading: 3046029.45Hz, 20.30C, 3.03470mm - Home XY:
G28 XY - Move the nozzle to the center of the bed
- Calibrate Z-Offset by running
BEACON_CALIBRATE-ACCETPandSAVE_CONFIG - Home Z (with a hand over the power off button!):
G28 Z
Evaluate Probe accuracy
PROBE_ACCURACY results: maximum 1.995843, minimum 1.994951, range 0.000892, average 1.995549, median 1.995626, standard deviation 0.000111
Evaluate Backlash
From the Mainsail console:
BEACON_ESTIMATE_BACKLASH
Median distance moving up 1.99644, down 2.00293, delta 0.00649 over 20 samples
Record this value in your printer.cfg
Calibrate Bed Mesh BED_MESH_CALIBRATE
- May need to update
mesh_minandmesh_maxvalues to account for new probe offset location (different from BLTouch location)
[!Update Z_Tilt config] I had to update my [z_tilt] points to account for new probe offset
Old BLTouch Mesh
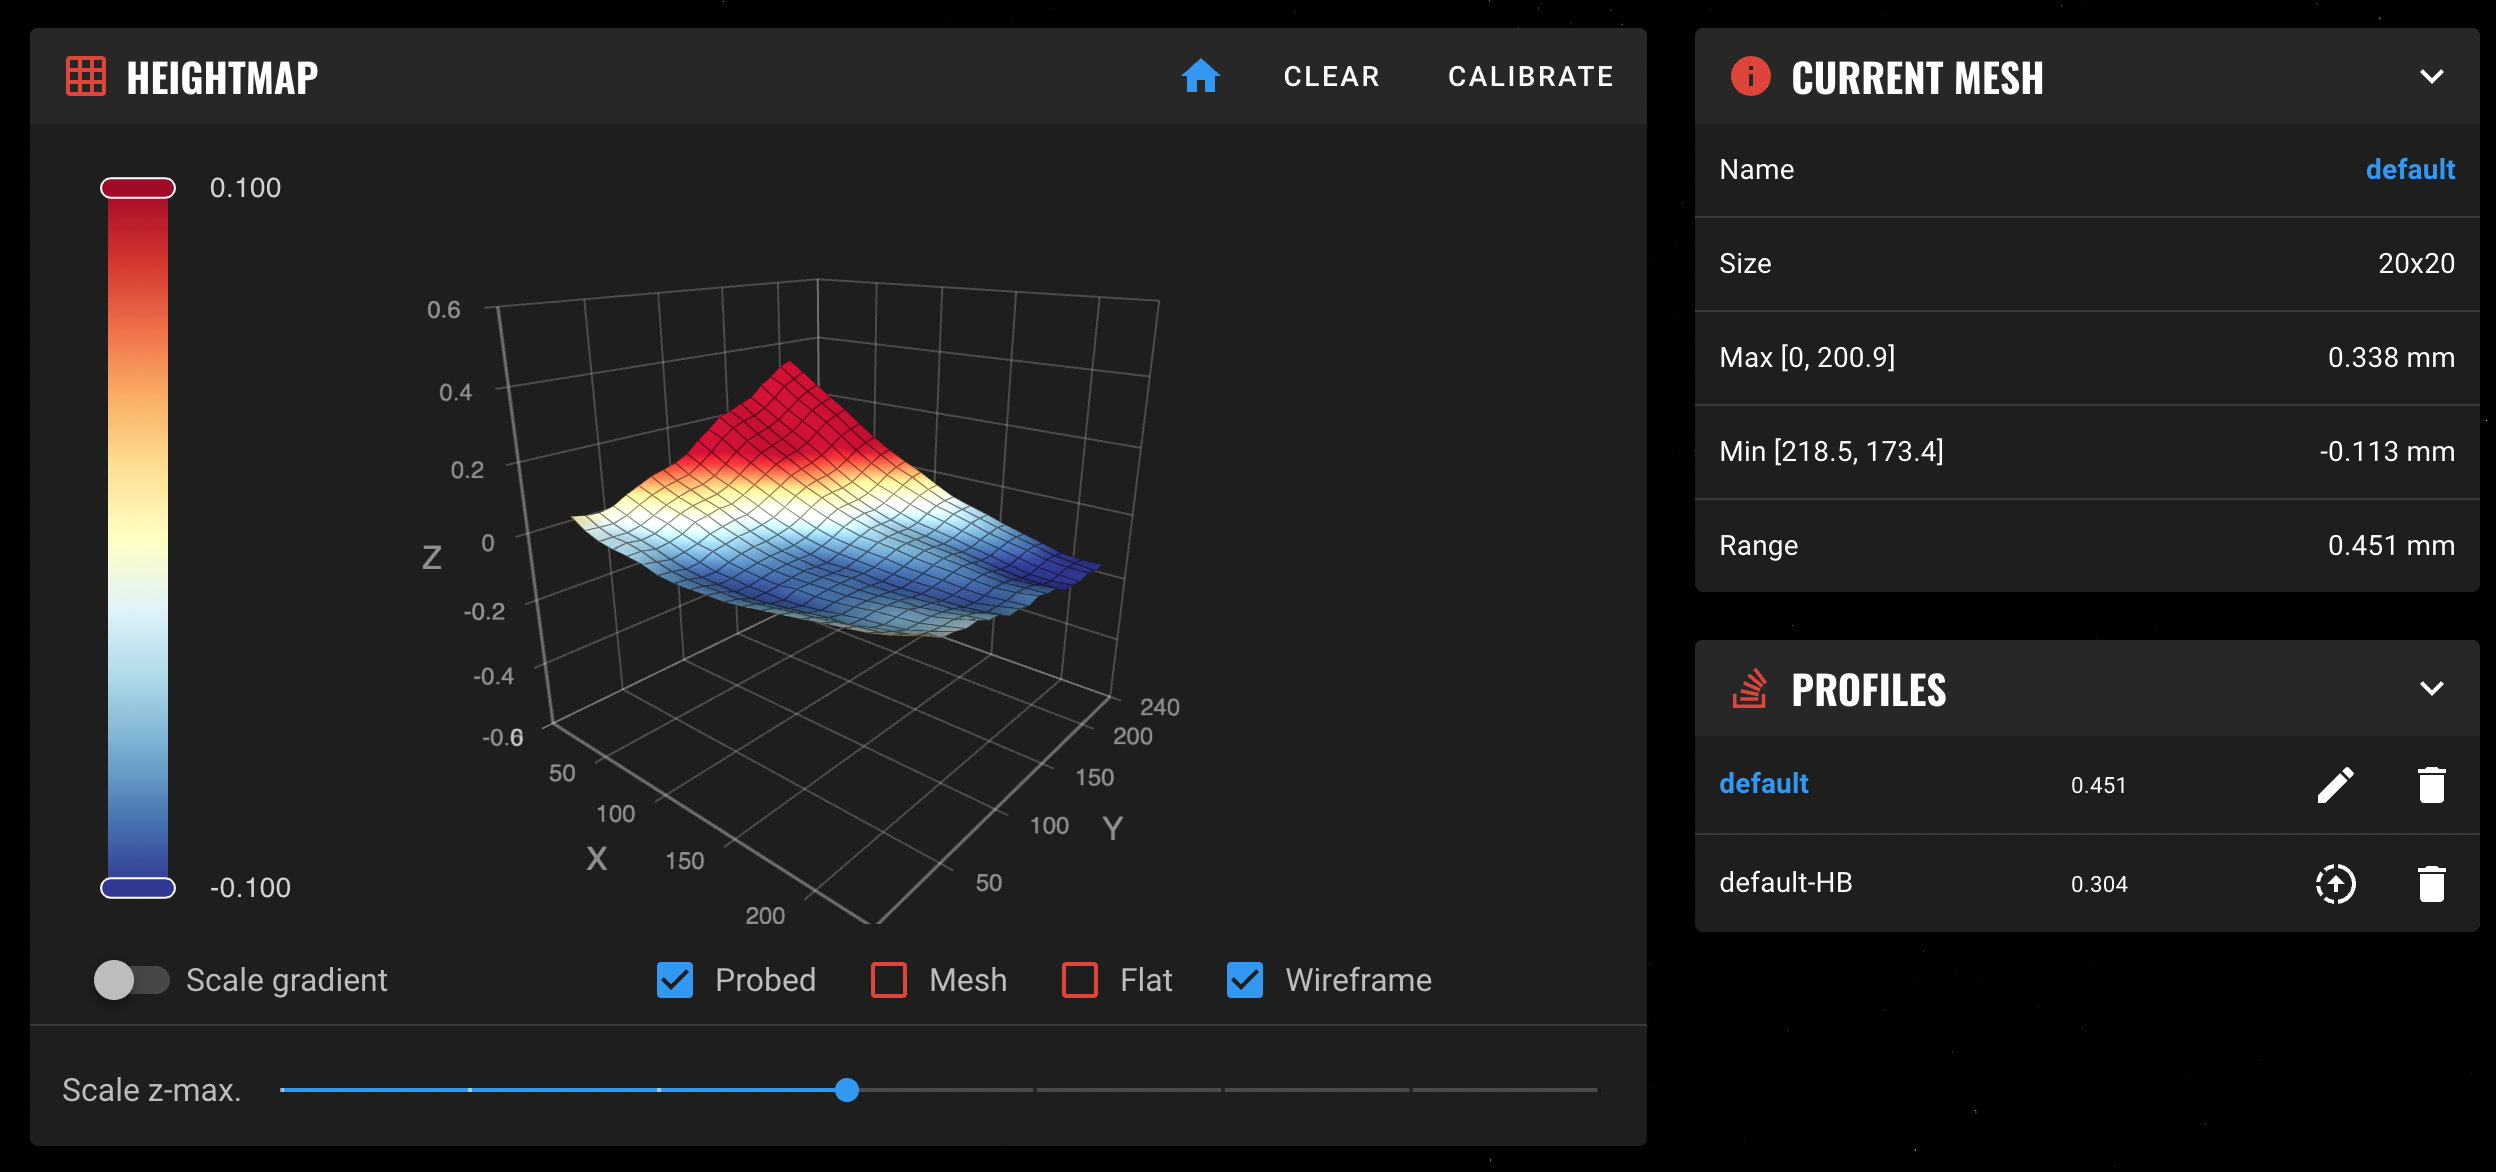
 Beacon 20x20 Mesh