TinyTouch Z Offset Probe
Using a membrane potentiometer and an ATTiny85 to repeatably measure your probe z-offset
What is this thing?
It’s a ‘membrane potentiometer’ that’s typically used to register touch input, connected to an inexpensive microcontroller to more repeatably measure how far away a 3D printer nozzle is from its build surface.

Why this thing?
- I wanted an easier and more repeatable way to measure my Probe Z Offset
- I don’t have enough room on my printer to use a sexbolt to enable an auto-z offset calibration
- I’m using a Beacon probe for a virtual z end-stop and bed mesh calibration
- I’m using a modified EVA tool head and not very interested in moving to other solutions
How does this thing help?
I had originally used the ‘paper method’ for determining Z Offset, and have struggled with it for many years… I never invested enough time to make it a repeatable process, always having to do additional steps (baby steps, many test prints, etc…) in order to get my first layer dialed in.
I recently started using an aluminum card of fixed width (a type of feeler gauge if you will) in place of a piece of paper, and it helped me improve my repeatability when measuring Z offset, however, I still needed to play around with baby stepping and test prints… Better, but not ideal.
Repeatability?
I believe the variability in measurement using the paper or feeler gauge method is due to the fact that there’s some subjectiveness (human feel) involved in determining just how much the nozzle is allowed to pinch the paper or feeler gauge. My guess is that this subjective measurement can introduce enough variance in measurement that it can affect first-layer consistency.
It’s amazing how much subtlety the human hand can feel!
This sensor replaces the paper or fixed-size feeler gauge when using the PROBE_CALIBRATE Klipper macro, and will consistently indicate when the nozzle is touching the bed, generally achieving a consistent z-offset measurement with a variance of +/- .01mm.
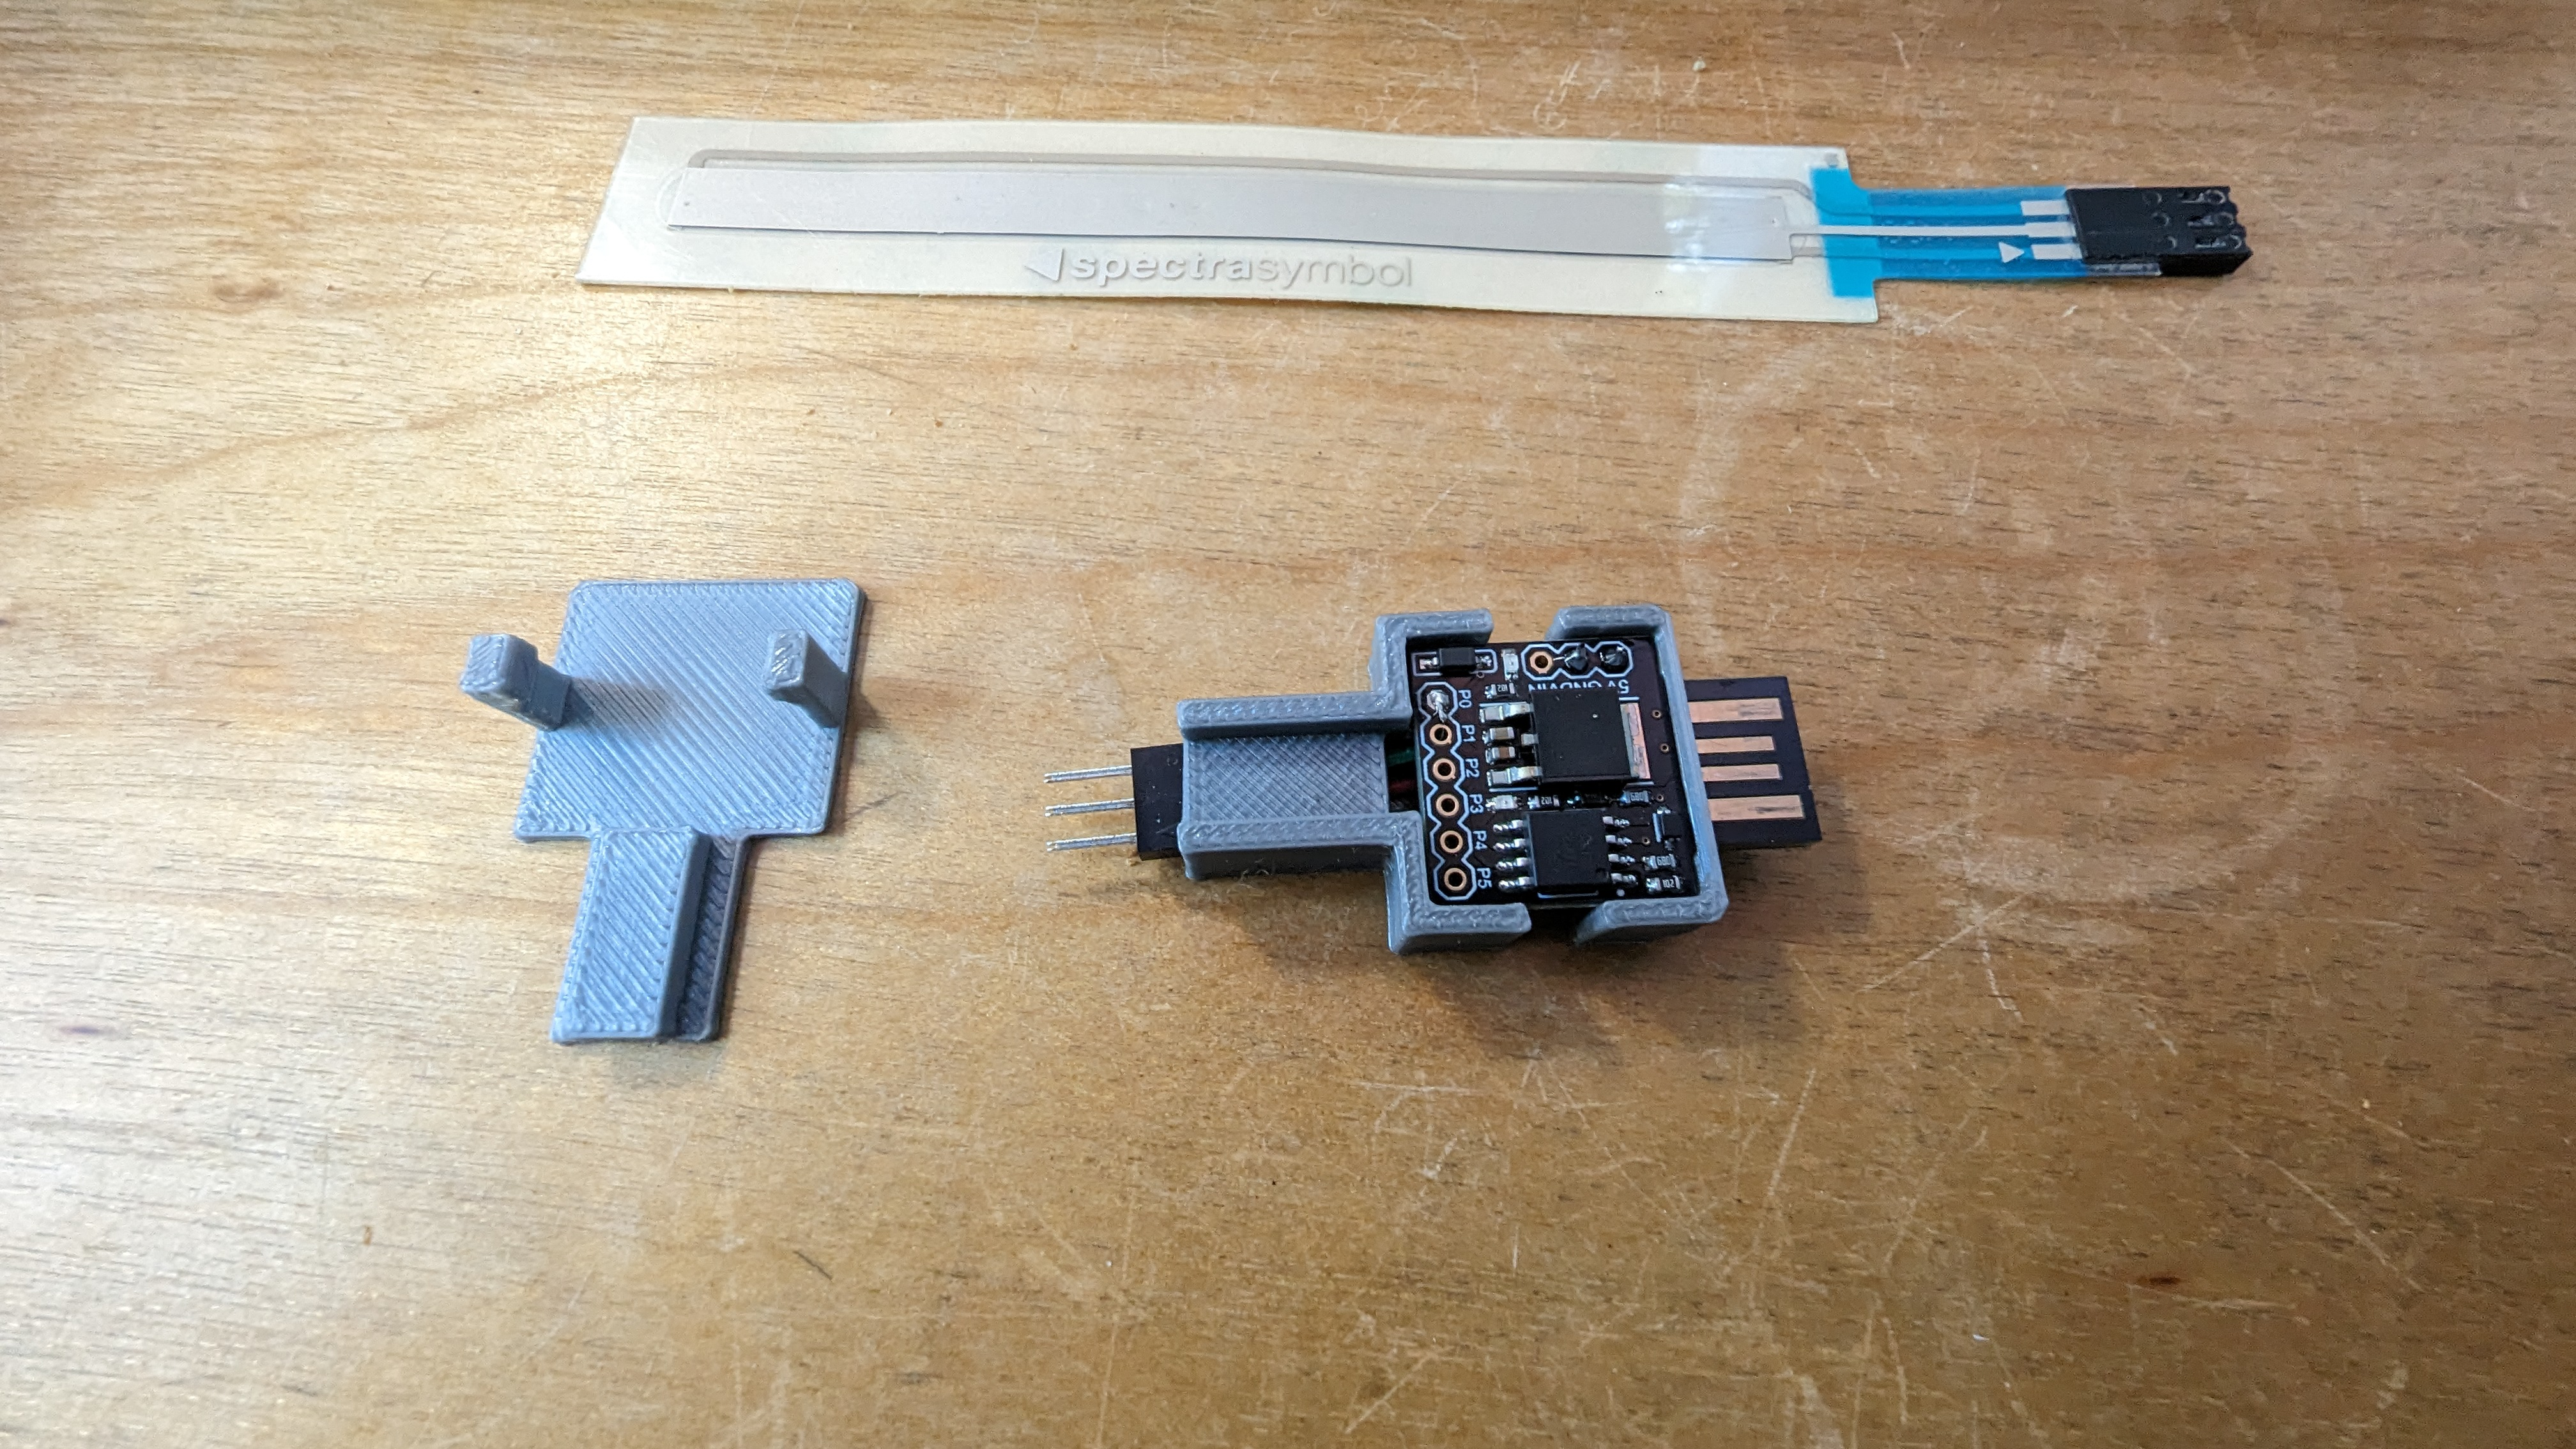
Parts
- ATTiny85 Dev board
- Spectra Symbol Soft Potentiometer (I used a 150mm, but 50mm ones work just as well)
- USB extension cable for power
- 3 Jumper wires and a 3 Pin 2.54mm pitch Dupont connector
- A 3D printed case to hold everything together
Spectra Symbol Soft Potentiometer Data Sheet
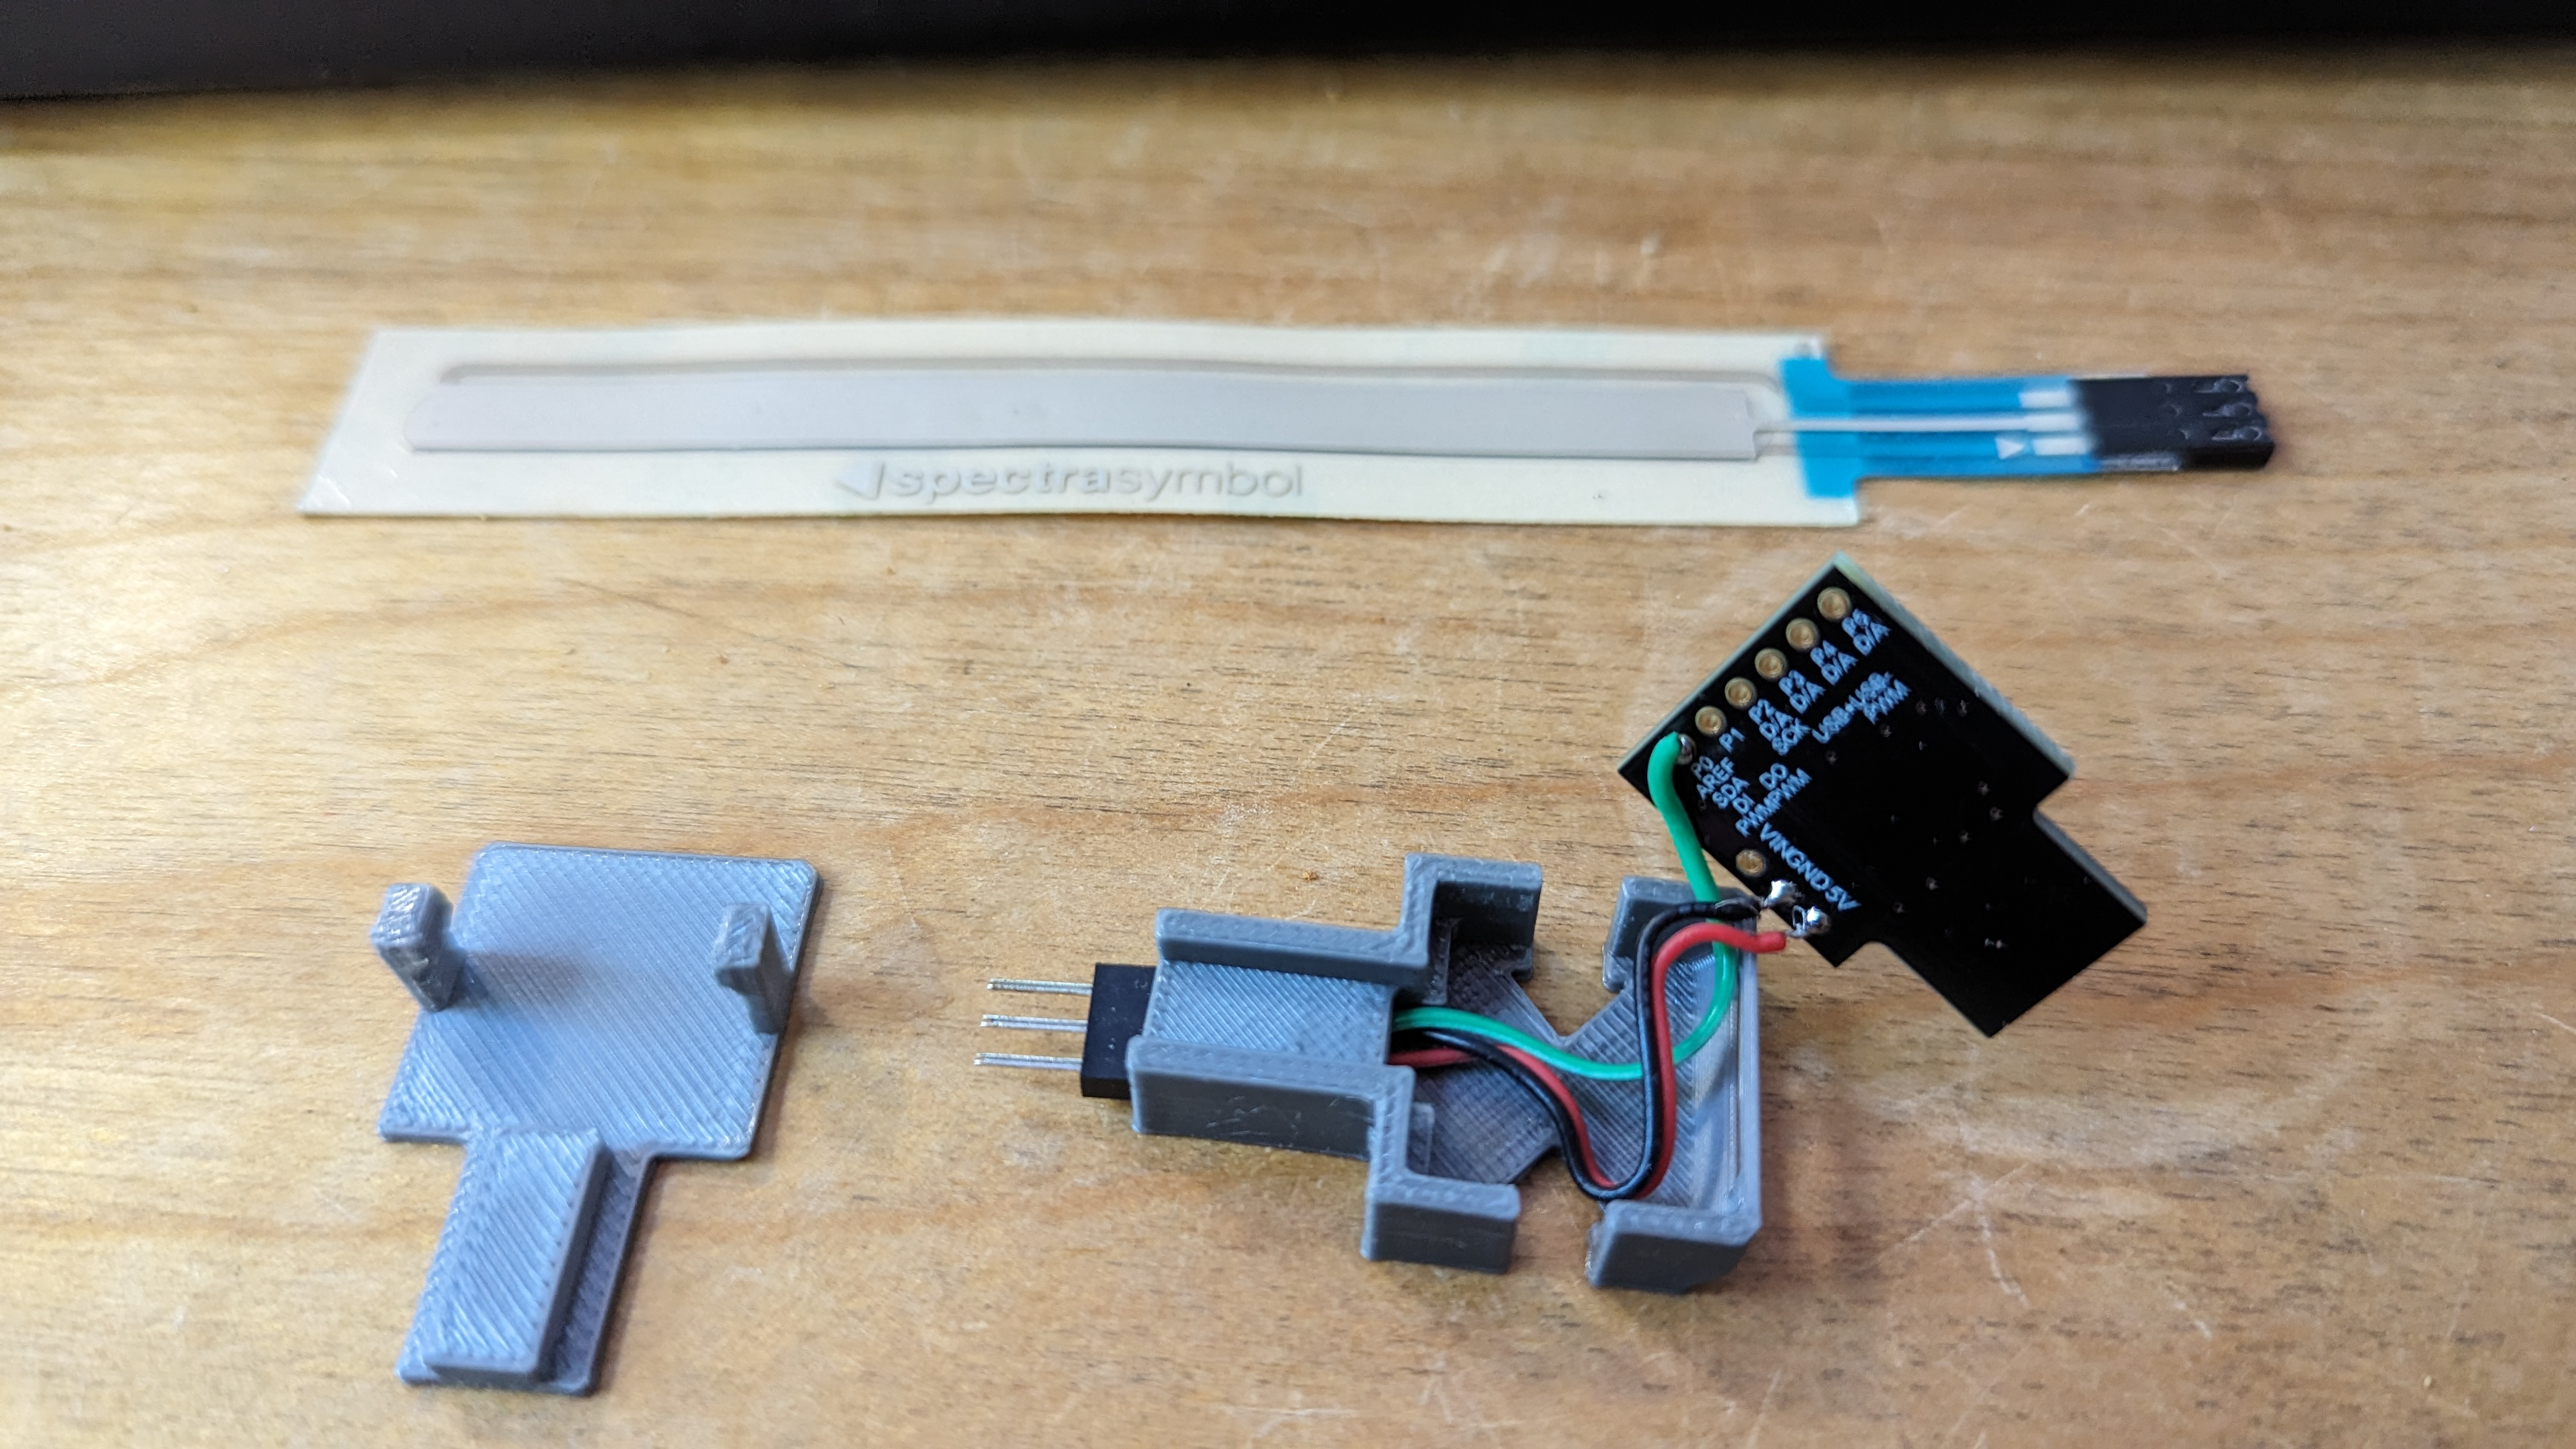
Wiring
This is a very basic circuit! We use the 5v, Ground, and P0 pins from the ATTiny85 dev board and connect them to a 3 pin JST connector (male in this instance).
From left to right the pin outs go 5v - Sensor Pin (P0) - Ground - corresponding with the Softpot pins.
- I ended up cutting about 3cm of jumper wire, and crimping the JST connectors before soldering.
- Once soldered, I fed the pins through the hole where the plastic JST conector will go, inserting the wires into the JST housing in the correct order (5v - Sensor Pin - Ground)
- This should provide enough length to insert the JST housing over the pins and into the 3D printed case
Programming
I’ve included the code and the VSCode / platform.io scaffolding used to help me program the ATTiny85 Dev Board. I’m pretty new to using VSCode and Platform.io to program microcontrollers, so I don’t have any useful advice to share outside of this:
- I needed to set the following value in the
platformio.inito successfully upload code to the ATTiny85 dev boardupload_protocol = micronucleus
Printing the Case
- I modified an ATTiny85 case originally found here: https://www.printables.com/model/52250-case-for-digispark-attiny85
- You will find the top/bottom parts of the cases in the stl folder
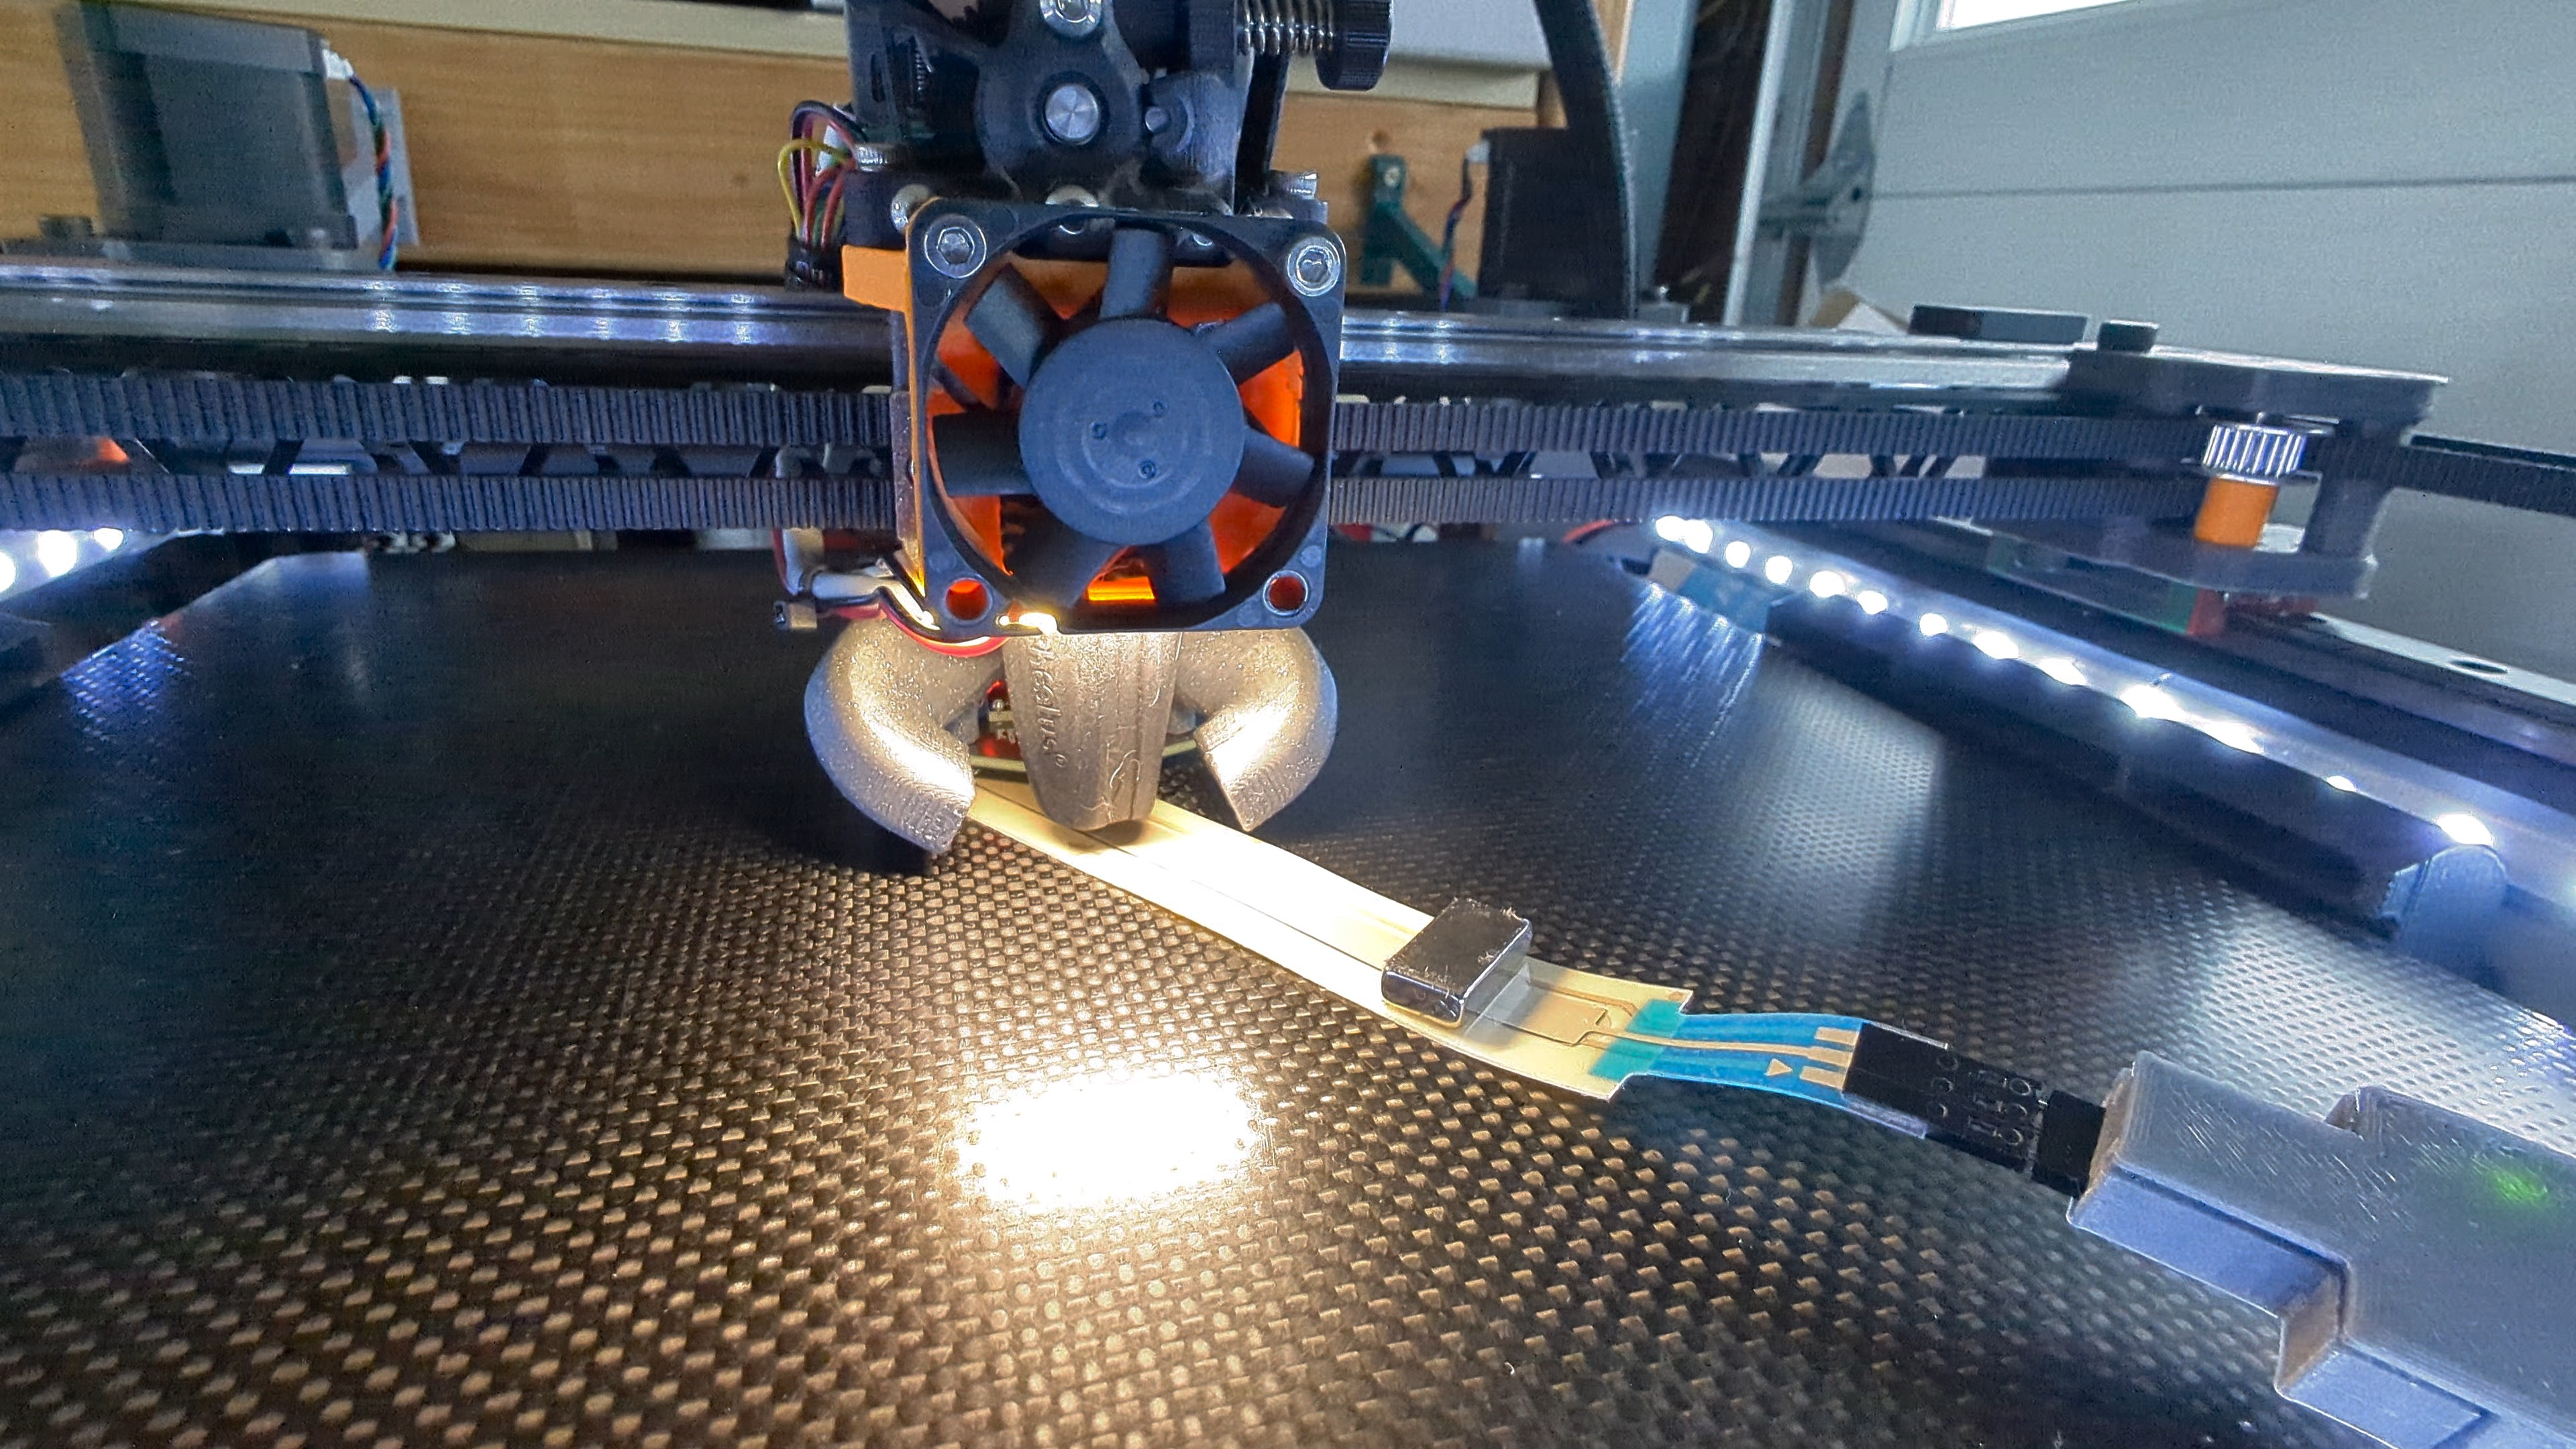
Usage
I’ve tested this with a Beacon probe, though I assume it will also work with other probes, but configuration fields will vary.
Configure Klipper
In the [beacon] section of your printer.cfg add the following line:
`cal_nozzle_z: 0.48`
This value is the thickness in mm of your soft potentiometer… It probably doesn’t hurt to measure your specific potentiometer as it may have a slightly different value.
PROBE_CALIBRATE
- Make sure your nozzle is clean and free of filament. If you’ve got any dried on filament stuck to your nozzle, you won’t get an accurate measurement!
- If your nozzle is squeaky clean - Run the
PROBE_CALIBRATEklipper macro. - Slowly lower the nozzle until it just touches the soft potentiometer and the red LED on the ATTiny85 lights up.
- Jamming the nozzle into the potentiometer could cause permanent damage by crushing the thin film actuator, go slow, and ideally in small increments!
- Back off the nozzle in .01mm increments until the red LED turns off
- Lower the nozzle again by .01mm until the red LED lights up - this should help you obtain a repeatable offset measurement of about .01mm
- Accept the offset value, save config and restart the firmware
Enjoy your perfect first layer!
Photos